Make-Ahead Holiday Gift: Melt-and-Pour Soap
Make-Ahead Holiday Gift: Melt-and-Pour Soap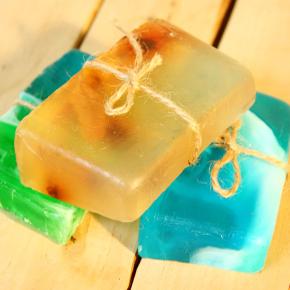
You've seen them everywhere from crafts fairs to bath boutiques: pretty handmade gift soaps. Clear and colorful or rich with natural additives for beautiful skin, they're a welcome holiday gift.
Best of all, they're easy to make using melt-and-pour soap. Heated in the microwave, clear or opaque glycerin soap base is combined with colorants and fragrances, then poured into molds to harden. When cool, soaps pop right out of the molds, ready to use.
Follow the soap-making tips and soap starter projects linked below to help you master this squeaky-clean craft.
Basic Instructions for Melt-and-Pour Soap
Basic Instructions for Melt-and-Pour Soap
Just the basics, Ma'am!
Use this general guide to begin soap crafting with melt-and pour soap.
For more advanced project ideas, see the links at the bottom of the page.
Materials and Supplies
- 4 oz clear glycerin soap base
- 4-8 drops soap fragrance
- 4-oz capacity soap mold
- microwave-safe measuring cup (2-cup size)
- instant-read thermometer
- spray bottle filled with rubbing (isopropyl) alcohol
- vegetable oil in oil mister or vegetable oil
(do not use pan spray)
Instructions
Prepare the soap mold by spritzing lightly with vegetable oil sprayer and wiping nearly dry.
Cut clear glycerin soap base in 1-inch chunks.
Place soap in a microwave-safe measuring cup.
Heat on High for 15 seconds, then for 5 second intervals until soap is melted. Do not allow soap to boil.
Remove measuring cup from microwave.
Add fragrance, colorant, and soap glitter if desired. Add these ingredients sparingly, a drop at a time. General guidelines are 1 to 4 drops soap fragrance per ounce, 1 to 4 drops colorant per 4-ounce bar. Mix gently but thoroughly after each addition.
Insert an instant-read thermometer to monitor soap temperature. When thermometer reads 120 degrees (or when soap forms a skin in the measuring cup), move skin aside and gently pour soap into prepared mold.
Immediately spritz the soap surface with a light mist of rubbing alcohol to control any bubbles that have risen to the surface.
Cool soap completely before attempting to unmold. You may put the mold in the refrigerator to cool, but do not put it in the freezer. Press the mold gently with your thumb to unmold.
Allow soap to cure 3 to 4 weeks before wrapping. Wrap completed soap with clear plastic food wrap, and attach a gift label with soap contents listed.
Makes 1 4-ounce bar.
Tips for Successful Soap-Making
Tips for Successful Soap-Making
Ready to make melt-and-pour soap?
Keep these tips in mind for soap success.
They'll help take you from newbie to master crafter in short order.
Try a Kit
Brand-new to soap craft? Try a kit! Soap-making kits contain everything you'll need to create your first projects. They're usually a bit less expensive than purchasing components separately, and they can teach you the ins and outs of a new craft quickly.
A good kit will spark your imagination for more ambitious endeavors, start you off with an assortment of tools and supplies, and give motivation a boost.
Patience is a Virtue
Melt-and-pour soap-making requires only four simple skills: cut, heat, cool and pour. Try to rush the job, however, and you'll mar the final product.
Patience is a virtue with soap-making. Each bar is built as a series of steps, with time between to allow for cooling of the soap base, hardening of poured soaps to support soap inclusions, and cooling completely before removing from the molds. Rush any of these processes, and you'll see the adverse reaction in the soap.
Measure by Measure
Soap-making isn't a difficult process, but it requires precision. Save time and soap mistakes by using an instant-read thermometer. It will monitor soap temperature precisely, saving time and patience. Add a timer so you can safely attend to other tasks when soap cools.
Less is More
At each step of the soap-making process, less is more. When heating cubes of soap base, microwave in short bursts, checking often--soap melts much more quickly than you might think. Overheating can cause quality to decline (and create a microwave mess), so never allow melted soap to boil.
Scent should be added sparingly. Soap, unlike other scented products, has scent embedded throughout the product; as it's used, more scent releases. There's no need to over-scent for fear that the fragrance will dissipate. Noses become overloaded quickly when using scented products. Remind yourself that what you smell after an hour of crafting is only a tiny fraction of what a fresh nose will experience. As a guideline, use only 1 to 4 drops of scent per ounce of soap.
Color soaps with a light hand. Over-use of colorant, even made specially for use in soap products, can cause staining when the soap is used. Add colorant drop by drop, blending well after each addition. It's easier to add a bit more colorant than it is to try to rescue an over-colored soap!
Tricks of the Trade
Soap experts know that rubbing (isopropyl) alcohol in a spray bottle is an essential piece of soap-crafting equipment. Use a light spritz of alcohol on all soap inclusions. Alcohol will enhance adhesion and remove any bubbles from the surface of the inclusion. Another spritz to the back-side of a newly-poured bar removes tiny bubbles that cloud clear soaps.
To oil or not to oil? Published soap references differ on the use of pan spray to lubricate soap molds. Most authorities recommend against using pan spray. Instead, use an oil mister to deliver a very fine mist of vegetable cooking oil to the mold. Wipe nearly dry with a paper towel before pouring soap into the mold.
Don't rush! Molds release best when the soap is thoroughly cooled. Removing soaps too early can cause stress marks in clear bars. In hot weather, do put cooling soap molds in the refrigerator to make unmolding easier. Never freeze soap, either!
Squeaky-Clean Ending
Soap is soap, and dishwasher detergent is detergent, and never the twain should meet. Soak soap-making equipment in water and remove soap residue completely before placing in the dishwasher.
Soap residue in the dishwasher can cause excessive sudsing, suds lock and flooding. [Go on ... ask me how I know!]
Alphabet Soap Recipe
Alphabet Soap Recipe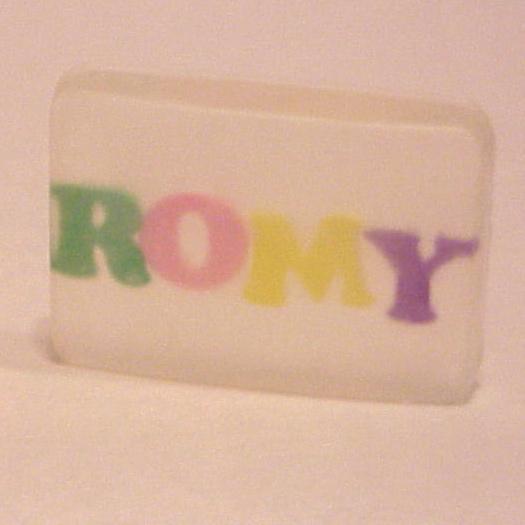
Splish-splash! A special child's name embedded in a bar of clear soap makes bath time fun for little ones. Pre-cut foam shapes make it easy.
More ideas? Add holiday messages to soaps for the guest room. For a "lady of the manor" touch, create personalized soaps with monograms or the family name for guest baths.
Makes 2 4-ounce bars.
Materials and Supplies
- 8 oz clear glycerin soap base
- 16 drops soap fragrance
- 2 4-oz capacity soap molds
- "fun foam" alphabet letters
- microwave-safe measuring cup (2-cup size)
- instant-read thermometer
- spray bottle filled with rubbing (isopropyl) alcohol
- bamboo skewers
- vegetable oil in oil mister or vegetable oil
(do not use pan spray)
Instructions
Prepare the soap molds by spritzing lightly with vegetable oil sprayer and wiping nearly dry.
Cut clear glycerin soap base in 1-inch chunks. Place four ounces soap in a microwave-safe measuring cup. Heat on High for 15 seconds, then for 5 second intervals until soap is melted. Do not allow soap to boil.
Remove measuring cup from microwave. Stir in 8 drops soap fragrance, mixing thoroughly.
Insert an instant-read thermometer to monitor soap temperature. When thermometer reads 120 degrees (or when soap forms a skin in the measuring cup), move skin aside and gently pour soap into prepared mold, filling the mold 1/4th to 1/3rd full.
While waiting, arrange letters to form the desired name. Reverse each letter (so it points backward) and reverse the order of the letters. Check with a mirror to make sure the name reads correctly when reversed.
Allow mold to stand for 5 to 10 minutes, until it has formed a skin strong enough to support the foam letter pieces. Spritz letters lightly with rubbing alcohol, and place letters in reverse gently on the cooled soap film. Use the bamboo skewers to make any tiny adjustments necessary. Allow to cool for 10 to 15 minutes.
Place remaining 4 ounces soap in measuring cup and heat. Add 8 drops soap fragrance, stir thoroughly and cool to 120 degrees. Pour soap gently over alphabet pieces, adding only enough soap to barely cover. Allow soap in mold to cool and form a skin for 10 to 15 minutes.
When alphabet letters are firmly embedded in cooled soap, reheat the remaining soap in the measuring cup. Stir and cool to 120 degrees.
Pour remaining soap into the mold, covering letters completely. Immediately spritz the soap surface with a light mist of rubbing alcohol to control any bubbles that have risen to the surface.
Cool soap completely before attempting to unmold. You may put the mold in the refrigerator to cool, but do not put it in the freezer. Press the mold gently with your thumb to unmold.
Allow soap to cure for 2 to 3 weeks before wrapping. Wrap completed soap with clear plastic food wrap, and attach a gift label with soap contents listed.
Makes 2 4-ounce bars.
Girly Gift: Confetti Creations Melt-and-Pour Soap
Girly Gift: Confetti Creations Melt-and-Pour Soap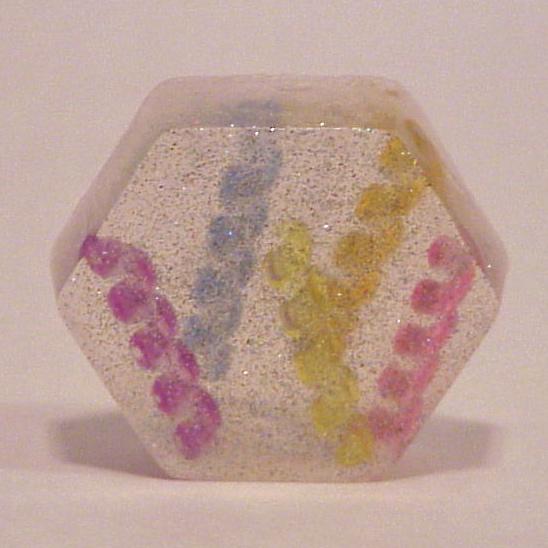
A two-in-one holiday gift for a special little girl: colorful plastic hair ornaments encased in a bar of glittering soap.
Made with clear glycerin soap base, soap fragrance and a pinch of soap glitter, this simple soap is an excellent beginning project for new soapcrafters.
Makes 1 4-ounce bar.
Materials and Supplies
- 4 oz clear glycerin soap base>
- small pinch soap glitter
- 8 drops lavender blossom soap fragrance
- assorted small plastic hair ornaments
(we used spiral hair twists) - 4 oz-capacity soap mold
- microwave-safe measuring cup (2-cup size)
- instant-read thermometer
- spray bottle filled with rubbing (isopropyl) alcohol
- bamboo skewers
- vegetable oil in oil mister or vegetable oil
(do not use pan spray)
Instructions
Prepare the soap mold by spritzing lightly with vegetable oil sprayer and wiping nearly dry.
Cut clear glycerin soap base in 1-inch chunks. Place four ounces soap in a microwave-safe measuring cup. Heat on High for 15 seconds, then for 5 second intervals until soap is melted. Do not allow soap to boil.
Remove measuring cup from microwave. Stir in 8 drops soap fragrance, mixing thoroughly. Add small pinch of soap glitter, and stir gently.
Insert an instant-read thermometer to monitor soap temperature. When thermometer reads 120 degrees (or when soap forms a skin in the measuring cup), move skin aside and gently pour soap into prepared mold, filling the mold 1/4th to 1/3rd full.
Allow mold to stand for 5 to 10 minutes, until it has formed a skin strong enough to support the hair ornaments. Spritz each hair ornament lightly with rubbing alcohol, and place gently on the cooled soap film. Use the bamboo skewers to make any tiny adjustments necessary.
Reheat remaining soap in measuring cup, stir and cool to 120 degrees. Pour soap gently over hair ornaments, adding only enough soap to barely cover ornaments. Allow soap in mold to cool and form a skin for 10 to 15 minutes.
When ornaments are fairly firmly embedded in cooled soap, reheat the remaining soap in the measuring cup. Stir and cool to 120 degrees.
Pour remaining soap into the mold, covering hair ornaments completely. Immediately spritz the soap surface with a light mist of rubbing alcohol to control any bubbles that have risen to the surface.
Cool soap completely before attempting to unmold. You may put the mold in the refrigerator to cool, but do not put it in the freezer. Press the mold gently with your thumb to unmold.
Allow 3 to 4 weeks for soap to cure before wrapping. Wrap completed soap with clear plastic food wrap, and attach a gift label with soap contents listed.
Makes 1 4-ounce bar.
Easy Gift: Starry Night Melt-and-Pour Soap
Easy Gift: Starry Night Melt-and-Pour Soap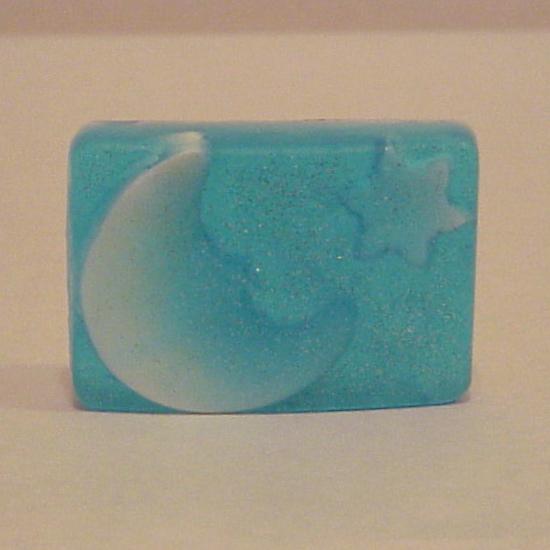
Transparent soap the color of the sky. A crescent moon and shining star glow through a sweep of glitter stars.
This project teaches how to add cut-out opaque soap inclusions to clear bars. A bonus: free printable gift tags make this a great gift for any occasion!
Makes 1 4-ounce bar.
Materials and Supplies
- 3 oz clear glycerin soap base
- 1 oz opaque glycerin soap base
- small pinch soap glitter
- 2 drops blue soap colorant
- 8 drops soap vanilla-chamomile fragrance
- 4 oz-capacity soap mold
- microwave-safe measuring cup (2-cup size)
- instant-read thermometer
- small loaf pan
- small moon and star cookie cutters
- spray bottle filled with rubbing (isopropyl) alcohol
- bamboo skewers
- vegetable oil in oil mister or vegetable oil
(do not use pan spray) - printable gift tags
Instructions
Spritz loaf pan sheet with vegetable oil.
Cut opaque soap base into 1/2-inch chunks and place in microwave-safe measuring cup. Heat in microwave for on High for 10 seconds, followed by 5 second intervals until melted. Do not allow soap to boil.
Insert instant-read thermometer to monitor soap temperature. When thermometer reads 120 degrees (or when soap forms a skin in the measuring cup, move skin aside and gently pour soap into prepared loaf pan. Soap should measure 1/8th to 1/4-th inch thick.
Allow to cool until nearly hard, about 15-20 minutes. Use cookie cutters to cut out small moon and star shapes from the opaque soap. Remove from pan and set aside.
Prepare the soap mold by spritzing lightly with vegetable oil sprayer and wiping nearly dry.
Cut clear glycerin soap base in 1-inch chunks. Place three ounces soap in a microwave-safe measuring cup. Heat on High for 15 seconds, then for 5 second intervals until soap is melted. Do not allow soap to boil.
Remove measuring cup from microwave. Stir in 8 drops soap fragrance, mixing thoroughly. Add 2 drops blue colorant andmix. Add small pinch of soap glitter, and stir gently.
Insert an instant-read thermometer to monitor soap temperature. When thermometer reads 120 degrees (or when soap forms a skin in the measuringcup), move skin aside and gently pour soap into prepared mold, filling the mold 1/4th to 1/3rd full.
Allow mold to stand for 5 to 10 minutes, until it has formed a skin strong enough to support the opaque soap pieces. Spritz moon and star lightly with rubbing alcohol, and place gently on the cooled soap film. Use the bamboo skewers to make any tiny adjustments necessary. Allow to cool for 10 to 15 minutes.
Reheat remaining soap in measuring cup, stir and cool to 120 degrees. Pour soap gently over opaque moon and star, adding only enough soap to barely cover moon and star. Allow soap in mold to cool and form a skin for 10 to 15 minutes.
When inclusions are fairly firmly embedded in cooled soap, reheat the remaining soap in the measuring cup. Stir and cool to 120 degrees.
Pour remaining soap into the mold, filling the mold completely. Immediately spritz the soap surface with a light mist of rubbing alcohol to control any bubbles that have risen to the surface.
Cool soap completely before attempting to unmold. You may put the mold in the refrigerator to cool, but do not put it in the freezer. Press the mold gently with your thumb to unmold.
Allow 3 to 4 weeks for soap to cure before wrapping. Wrap completed soap with clear plastic food wrap, and attach a gift label with soap contents listed.
Makes 1 4-ounce bar.